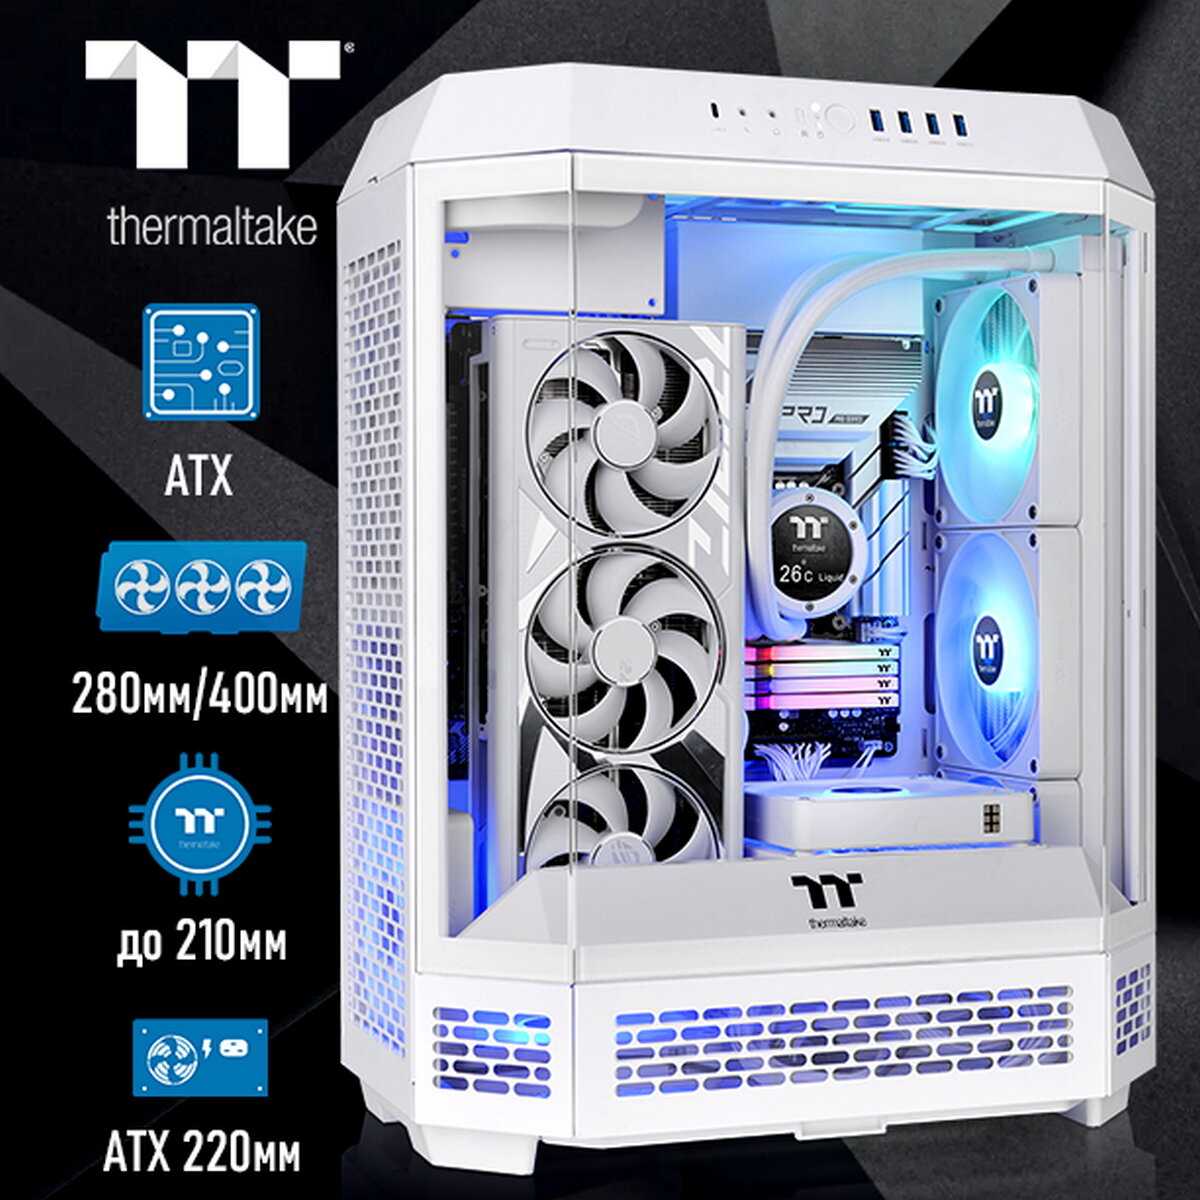
Отзывы о Корпус Thermaltake The Tower 600 (CA-1Z1-00M6WN-00)
260 отзывов пользователей o Thermaltake The Tower 600 (CA-1Z1-00M6WN-00)
Пользовались
Thermaltake The Tower 600 (CA-1Z1-00M6WN-00)?
Поделитесь своим опытом и помогите другим сделать правильный выбор
It also isn't as easy to control as my stock intel CPU fan. I had to switch it to voltage in the BIOS just to turn it down so its slowest setting to make it quieter. The other settings didn't have an effect on it.
But, with all that said, my CPU is ice cold. Even during high load it's only at 36 degrees (c)... so it definitely does the job intended !
My only real issue with it was that when it came to mounting my Thermaltake 300ml Pump + Res combo is that I couldn't use some of the mounting hardware because it was compatible with their own case? So I was forced to use the case bracket to mount my pump/res by it's "feet" which is fine, it works. I just think it looks tacky having this mounting bracket sticking out from the side but it's something I'll just have to modify whenever I get bored and decide to redo my loop configuration.
Conclusion. Sexy case and always catches folks attention when they see it (I have it sitting behind me in my stream thanks to 20'+ cables running back to all my other stuff). I wanted to make this PC which I've dubbed "Big Bertha" (she weighs a lot w/ everything installed) not only a beast in terms of performance but also something that looks uniquely beautiful (to each their own) and this case allowed me to capture that. The only thing I didn't catch was that this comes with one of Thermaltakes PCIe Riser Card Cables and I had already bought the exact one separate but o well. Guess that just means I'll have to run SLI in the future if GPU's ever come back down to earth.
*Update 5/8/2019*
So I decided to make a few changes to my loop, swap in RGB fans, liquid cool my GPU and gave the case a little bit of a makeover (painted it white and cut down the pump/res bracket so it doesn't stick out so far).
I will admit trying to attempt any "cable management" can be a bit of a struggle in the tight space in back (especially if you add say....8 RGB/PWM fans and a RGB Sync Controller) then again there's more room in there than your average case provides.
My Build:
Core i7-8700K
ASUS ROG Maximus X Formula
MSI Gaming Radeon RX Vega 56
CORSAIR DOMINATOR Platinum Series 32GB (2 x 16GB) DDR4 DRAM 3000MHz
EVGA SuperNOVA 850 G2
Creative Sound Blaster Recon3D THX PCIE Sound Card SB1350
Logitech G502 Proteus Spectrum RGB Tunable Gaming Mouse
Thermaltake Core P90
Cooling Parts Vary: Thermaltake Res+Pump combo, XSPC Raystorm Neo CPU block, EK Fittings, AlphaCool 480mm Radiator, Thermaltake Fans, Thermaltake PETG 16mm tubing
This thing is soo sturdy, albeit heavy. The bolts on the glass are plenty strong to keep this thing suspended under my table I built it into.
The options for placement and being able to vertically display a GPU are great. I have had no issues with the PCI-e riser included for my MSI GTX-1080. I wound up buying a second PCI riser for my wifi card.
Cons
- Instruction manual doesn't cover much for assembly. I had a really hard time figuring out which of the 10 screw varieties were the right one to attach each piece (had to trial and error).
- I wish there was some kind of L bracket or something to mount my 5 old noctua fans for more airflow around the outside of the case. Thermals are 2-4ish degrees better than in my corsair spec-01 enclosed case.
- i wish the back cover wasn't a crappy metal slide in style which 1 notch always gets missed. Can't complain though since they would have had to raise the price otherwise.
What I learned assembling it
- install GPU prior to PCU if mounting with the riser. Use thumb tighten screws for all 4 GPU bracket connection points.
- remove the heavy wall mount plate on the inside before anything else. Helps bring the weight down if you don't plan on wall mounting it.
- attach the big feet and small rubber ones so you can rotate it while installing.
Also, what made matters worse, I lost 1 hour because the motherboard to case screws were not the right size. Fortunately, these are standard female screws. I moved those screwed from my old PC. I dont know how they produced it with bad threading.
Really painful to put together. Took me 4-8 hours, what should have taken 1 hour. Nice once complete. But I would not do it again. Not worth my time.
- fantastic cable management area
- plenty of space to work around
- solid vertical gpu mount
- room/hardware for open loop cooling
- can mount a 240mm radiator
- looks PHENOMENAL with Good components
- very sturdy and well built
Cons:
- comes with thermaltake's cheap pci extension cable
- only has 1 2.5" ssd and 3.5" hard drive mount, unless you don't use the radiator
- metal bracket inside the case is completely pointless
- the motherboard spacer screws are really jenky and don't leave much room behind the mobo for cable routing
- the case is very large and heavy for a mini itx build
- the radiator mount width is only 122.5mm wide, so you can't mount a 280mm radiator and certain radiators, like the nzxt kraken x52 and corsair h100I v2, will not fit
- it doesn't come with wall mounting hardware
- the assembly instructions are absolutely horrendous; it boggles me that a company would make such a great case and hand out instructions seemingly written by a 5 year old
All in all, if you want a great looking mini case then this is the best you'll get, but if you want a mini mini case then get something like the corsair v1.
Some reviews mentioned hard drive placement. I would say that if your going to use more then an M.2, look toward the larger p3 or p5. The internal space does have room for two hard drives inside, but this is precious space when it comes to cable routing. I removed both cages because I was using an M.2 and didn't need the storage. So I had tons of room in the case for cable management.
And cable management is a mixed bag. Not a negative. Just make sure you plan a lot! Pre-run every cable. Unlike most cases, there isn't a ton of holes to pass cable through, so you have to really think about where things should go. Take your time, and it will be fine. Keep your peripherals to a minimum, and you should be good.
I mounted a Kraken x52 on the right side mounting plate. According to previous reviews and information, the space here is limited so I grabbed the x52 instead of the x62. Trying to squeeze the radiator into the recess would have been tight, but I elected to mount the stock fans to the rear plate, pushing the rad out beyond the recess, then mounted some TT HD120's on the front, for a push pull (exhausting back as there is nice grill opening for just such a setup). It makes it nicer, and eliminates the issues others were having with mounting the rad. My thoughts on that are; you're buying an open air platform, put shiny fans on, and use the stock ones for the heavy lifting.
The only word of caution I would have is Power supply cables. If you are thinking about some aftermarket parts, I would say go for it. They tend to be more flexible, and that flexibility will come in handy when trying to route your ATX power connector behind the board. If you are using stock connectors, then I would highly advise pre-flexing the cable either way.
Last and most important. Take your time! It pays off in the end.
On the other hand, it looks nice, has a simple glass look, and is very sturdy. Most of the people buying this are just buying for the looks, but the instructions are very poor, and it is very heavy. I think this case is not meant for beginners.
Pros:
1. Amazing look
2. Solid construction
3. Red color is a great match to my msi board accents
Cons:
1. Where does the Power supply actually go? I mean you can guess 1 of like 4 places. I got it right on the 3rd try
2. If you opt to use the VGA tray, mount the card holder thing before you put the tray on. It doesn't make that very clear, but if you think in terms of puzzle games it is likely to be obvious
3. Expecting to be able to wall mount because the description says wall mountable? Yea, but only if you spend more money to get a special bracket which also isn't clear.
Overall it is an awesome case, but is very much geared to those with liquid cooling and SSD drives.
The tempered glass panels have been pared down slightly to 4mm thickness from the 5mm of the previous models. They still feel substantial though personally I would have preferred thicker panels for an even greater perception of robust build quality.
The case comes fully assembled and I'm astonished that it arrived intact. Though I purchased it new direct from Thermaltake, the package had the look of an Amazon warehouse item that had already been shipped a few times. It was beaten up pretty badly, appeared to have been re-taped and was partially crushed in on one side. There's a single piece of styrofoam covering each end but otherwise that's it - no other padding or packaging for the other sides. That's the way traditional cases are usually packaged, but there's a lot of glass here.
Still, as bad as the box looked, no glass panes were cracked or shattered. That, despite the notoriously rough-handling folks at UPS having apparently ignored the "fragile" warning on the box, unless Thermaltake shipped it out in such poor condition which I suppose is possible...?
As with the other two models, Thermaltake advertises this as an open case but here the rest of the glass panels needed to "close" the case into a more traditional box come standard. There are still plenty of gaps and spaces, however, and I'm not yet sure exactly how dust will play into the equation over time. Hopefully, proper fan configuration - notably positive pressure, should help mitigate dust accumulation problems.
I'm keeping this build to a minimum so at least with my configuration noise isn't a factor at all - even with the main side panel off. You may want to keep the gaps and spaces in mind though if you're planning to put noisy components into the chassis.
The side with the most open space by far is the rear panel. It seems more refined than the predecessor models though it still doesn't have the same completely finished look of a more traditional chassis. This seems like an intentional design decision on the part of Thermaltake in order to maximize configuration options.
Keep in mind though that if you must have a traditional finished look to the rear of your case, you might have some issues here. The motherboard and power supply mount recessed by about 1 to 2 inches. Of course, functionally, that really doesn't seem to be a problem. Be aware that if you have an older motherboard like I do with a standard I/O shield that would normally wedge between the ports on the motherboard and a normal ATX case, it simply won't work here. You'll have to leave the I/O shield off. No big deal, really.
The back cable management and hard drive mounting area seems well designed with plenty of depth in the compartment. Three plates are included for mounting drives and you can put a single 3.5" or two 2.5" drives on each one. Mounting points exist for a couple more drive plates (sold separately). The removable VESA mounting block is nevertheless rigid and should provide a solid foundation if you choose to wall or TV mount the case.
There are a total of three dust filters included - one each for the top and bottom which are interchangeable but a little wider than the third filter that can either be placed at the front of the case or over the perforated opening on the back panel. A fourth filter would have been a nice addition.
I particularly like the size. I had considered a Core P5 at one point but ultimately decided against it because I felt it still wasn't quite as big as I what I wanted. I simply transferred existing hardware from an older mid-tower and at this point, other than adding some modern fans, I have no intention of cramming loads of additional hardware into it. I think a minimalist, more-space-than-you-need look fits the case well.
The glass tint is not too dark or too light but seemingly just right. It gives all the inner LEDs a sublime glow when the case is viewed from just about any angle.
Overall, I'm pleased with the P8. I think Thermaltake will sell many of these once the reviews start showing up. I researched cases extensively before deciding on this one and I think for the price it competes well.
Highly Recommended!
Remove the VESA mount plate to make it lighter if you dont plan to wall mount it.
Remove the filter if you are exhausting air out the back.
Plan to buy yourself a new PCIE x16 3.0 riser as they are a one time use. Handling it too much causes the ribbon to break. I use an empty toiler roll to make my bends wide, the riser stoped working after I mover the riser into a different slot. I moved it with enough care as disarming a bomb, still broke. Again I own a P3 and P5 so Ive gone through plenty of these risers from all sellers on Amazon. Have not tried the super expensive riser Thermaltake just came out, the one where it was demostrated that it can be twisted around.
Good quality/craftsmanship. Out of the box I it is a good baseline for case modding. One could actually daisy chain these together!
**CONS:** seems too big for an itx, but a little bit small for mATX. No mounting hardware for SFF PSU is included.
This will fit a micro ATX (mATX) mobo, but with some overhang, depending on how you mount the board. It fits an itx as well, but an itx mobo will look tiny inside this case... not a bad thing, though, as you'll have tons of space for other stuff. It's easy to mount to the wall if you buy an extra fralt-screen-tv wall mounting bracket like this one:
Build Specs:
Thermaltake P3 T6
Asus Maximus IX Formula (Front panel 3.0 header doesn't fit next to my x62 rad. I don't blame the case for this, due to unusual position on the board)
7700K
NZXT X62
Asus 1080TI Strix (The GPU length maximum is only required in the (traditional) horizontal configuration. Placing it vertical with the included riser causes no issue with my 11.73" card and push 240mm rad)
4x SSD (double side tape two of them together in the bottom slot below rad, two in the designated bays)
Total build weight for wall mount: 41lbs.
Even though the P3 can fit an ATX motherboard, I wouldnt recommend it if you have a radiator mounting to the right, it will block the SATA connector slots.
Overall, this is just not a case that's worth the price.