Отзывы о 
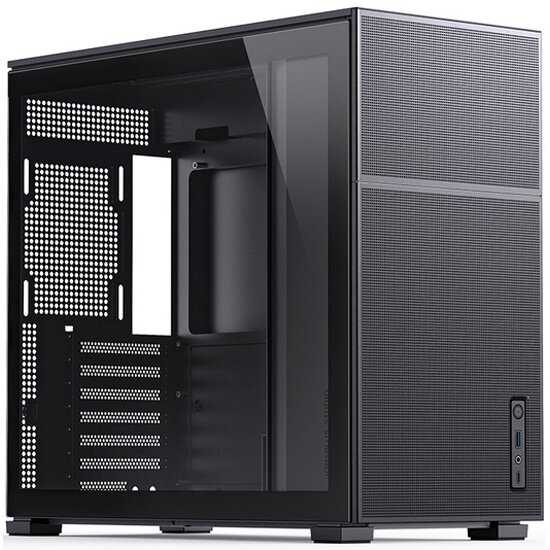
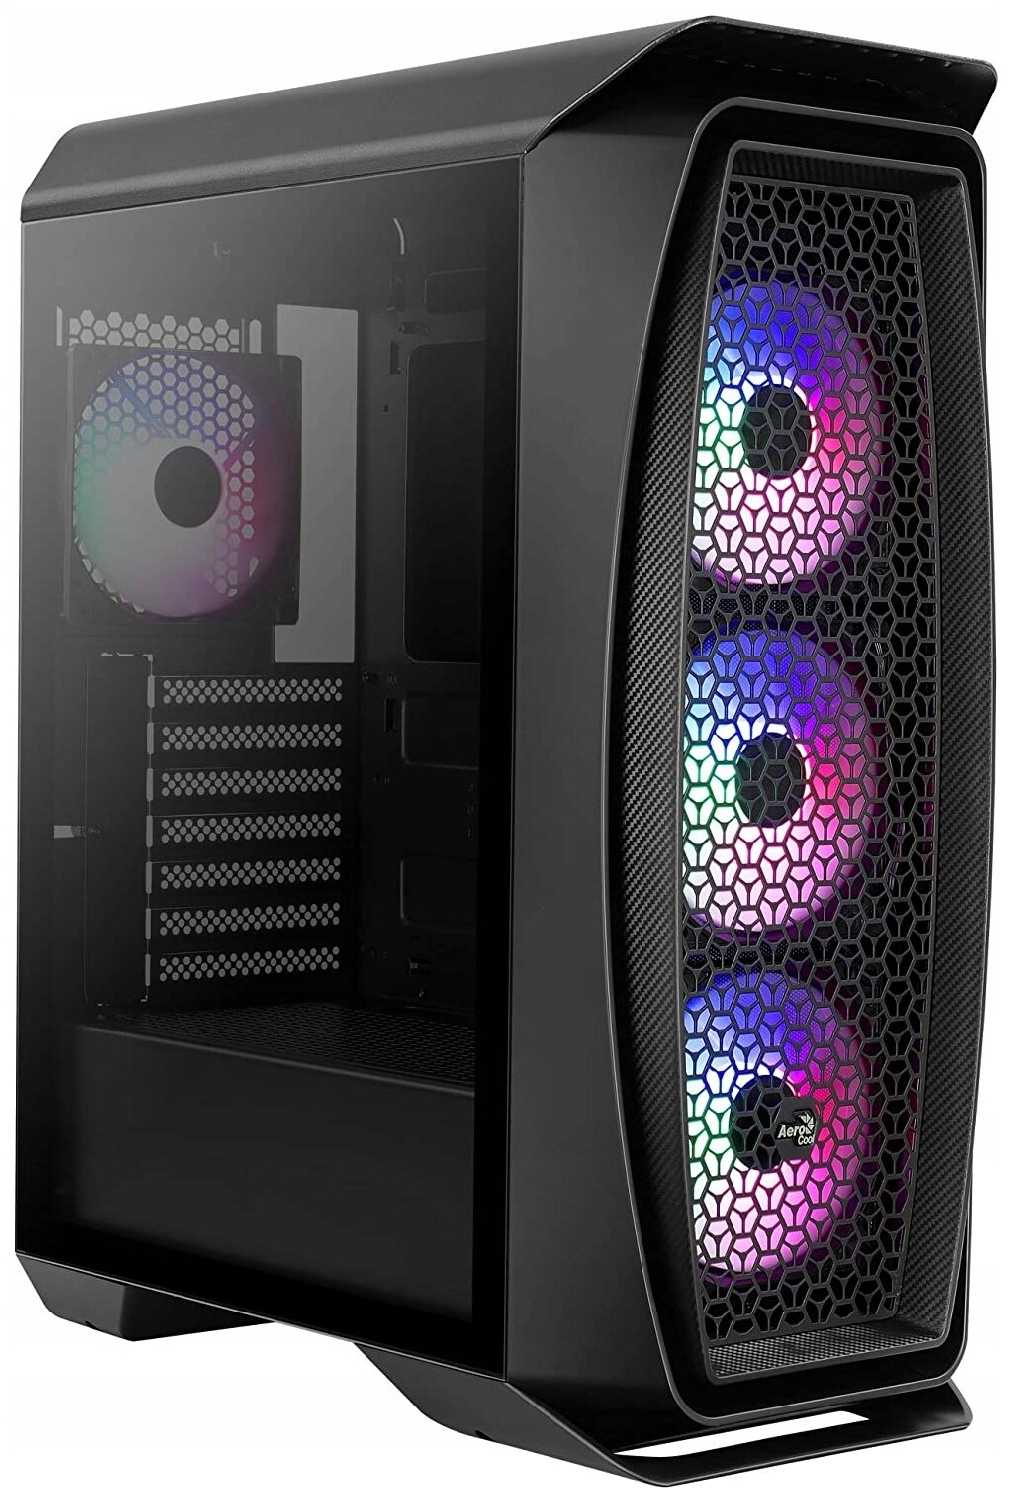
Компьютерный корпус AeroCool Aero One Frost
2298 отзывов пользователей o AeroCool Aero One Frost
Пользовались
AeroCool Aero One Frost?
Поделитесь своим опытом и помогите другим сделать правильный выбор
Let me list the issues:
- No RGB Hub or Fan Hub, you have to connect each individual fan to a header on your motherboard( if it has that many )
- To install an SSD, the only mounting place possible blocks one of the 2 available cabling cutouts for power cables etc..
- To install a HDD you have to completely disassemble the bottom portion of the case
- To remove the bottom front fan, you have to completely remove the HDD cage and remove the power supply so you can very tightly use a screw driver to un-screw the fan screws..
2. Cheap Material... Easily Dented..(For Picture on Arrival)
3. Light Weight.. Not Durable
4. Super Tight for DVD Drivers (Front Panel cables are very Congested).
5. On Delivery PC case Package and Side Covers are damaged and dented)
6. Waste of Money and Time(Ordered on 26-09-2020)
I don't want to waste my time and money in Returning and reordering another item from the Same Supplier.
Worst Experience in Amazon ( First Time )
Mainboardgrößen: Ich habe ein Asrock B450 Pro4 (ATX-Format) und es hat ausreichend Platz. Auch mein altes noch größeres Mainboard (Asus Sabertooth 990FX R2.0) hat noch Platz darin. Damit ist es für ALLE Mainboardgrößen bis 30.5 x 24.4 cm geeignet.
Grafikkartengrößen: Ich habe eine Geforce GTX 980 mit 29,9 x 11,4 cm ohne Probleme unter bekommen. Etwa 4 Finger sind noch Platz zum vorderen Gehäuserand.
Festplatten: Es können unten im Schacht zwei 3,5" Festplatten mittels Schulsystem untergebracht werden. Kleinere 2,5" Festplatten (SSD) können an der Rückseite montiert werden.
Kabelmanagement: Es gibt genügend Öffnungen um die meisten Kabel gut hinter das Mainboard zu verstecken. Leider sind die Öffnung ohne Gummiteile und darum optisch nicht so schön.
Seitenfenster: Hier gefallen mir zwei Dinge besonders gut. Erstens ist das Glas abgedunkelt, was für Beleuchtungseffekte besonders schön ist. Ideal für low-budget-PCs, die nicht so hochwertige Komponenten haben, da man diese nur schlecht sieht. Zweitens handelt es sich um eine ganze Plexiglas-Scheibe, ohne Rand. Das ist bei einigen anderen Modellen auch heute noch nicht der Fall! Vom Optischen her erkenne ich zwischen dem Plexiglas und einer echten Glasscheibe keinen Unterschied.
Positiv:
- schlichtes, aber schönes Design
- LED-Streifen kann in mehrere Farben und Laufmuster per Tastendruck gewechselt werden
- abgedunkeltes, randloses Seitenfenster
- genügend Platz für Gamer-PC
- abnehmbare magnetische Staubfiltermatte
- geringe Außenmaße
- Standfüße mit Gummimatte
- Metallschacht unten für Netzteil und Festplatten
- Anschlussmöglichkeiten oben (1x USB 3.0, 2 x USB 2.0, Speicherkartenlesegerät)
Negativ:
- kleine Verarbeitungsfehler (LED-Streifen unsauber verarbeitet)
- hinteren Abdeckungen müssen herausgebrochen werden (für Grafikkarte usw.)
- teilweise große Öffnungen für Kabelmanagement
- Rückseite nur wenig Platz für Kabel (Seitenteil ist schwer zu schließen)
- nur ein Lüfter auf der Rückseite verbaut (vorne können noch zwei eingebaut werden)
Fazit:
Kurz bevor ich mir den Aerocool Rift kaufte, habe ich den Sharkoon TG5 RGB bestellt. Dieser kostet rund das Doppelte, sieht optisch schlechter aus und ist von der Verarbeitung ein Witz!
Ich kann das Aerocook Rift für alle die ein wenig LED-Feeling haben wollen, aber nicht mehr als 40 Euro ausgeben möchten, nur empfehlen!
CPU: i5-8400
GPU: KFA2 GTX 1060 6GB
Motherboard: Tampa2
RAM: Micron 8GB
^falls relevant.
Mein Hauptkritikpunkt: Im Werkszustand habe ich meine GeForce GTX 1050 Ti nicht einbauen können. Das lag daran, dass ein Steg über den Einbauschächten des Gehäuses im Weg war. Wahlweise blieb ich mit der Blende an diesem Steg hängen oder saß mit der Blende auf dem Mainboard auf, wenn ich die Karte darunter durchfädeln wollte. Letzten Endes habe ich das Problem gelöst, indem ich den Steg mittels Werkzeug aufgebogen habe.
Insgesamt ist das Gehäuse aber trotzdem empfehlenswert. Es schaut gut aus und ist bis auf das kleine, erwähnte Problem sehr durchdacht. Die LED-Beleuchtung ist eine nette Spielerei, die ich persönlich aber nicht brauche.
Für Kabelmanagement ist genügend Platz, sollte man es mit der Menge der Kabel nicht übertreiben.
Lautstärkedämmend ist das Gehäuse für den Preis natürlich nicht. Die HDD hat in der HDD-Halterung die beiden rechten Steckplätze der RAM überdeckt (AB350M Pro4 Motherboard).
Ein gutes Budget-Gehäuse.
Positiv : Das Kabel Management ist ganz in Ordnung, ich hatte kein Problem für dieses Build meine Kabel schön zu verstauen, da hatte ich schon andere Gehäuse in dieser Preiskategorie wo dieses 0 vorhanden war.
Positiv : Das Design ist ganz schön gewählt, es sieht schlicht aus, hat vorne eine kleine Glasscheibe mit einem verbauten Lüfter.
Neutral : Die Wärme im Gehäuse ist nicht sonderlich gut, aber auch nicht ganz schlecht, ich würde aufjedenfall keine größere Grafikkarte verbauen. Die Grafikkarte hat nicht sehr viel Luft zum Atmen , sodass ich in Games trotz neuer Wärmeleitpaste bei 85 Grad liege. Die Temperatur des CPU's ist ganz in Ordnung und man hat die Möglichkeit noch einen kleinen Lüfter hinten zu verbauen.
Negativ : Das Blech dieses Gehäuses ist leider nicht sehr stabil, das Gehäuse kam schon leicht gebogen bei mir an (siehe Fotos). Es ist zwar nicht sehr viel, trotzdem ziemlich ärgerlich für einen neuen Artikel. Die PCIe Slots ist auch nur ein dünnes Blech was man rausbrechen muss, jedoch waren die leider auch schon bei der Ankunft etwas verbogen was Optisch natürlich nicht so gut ist.
Negativ : Position für die HDD , diese liegt genau auf der Höhe der RAM-Slots, was eigentlich kein Problem darstellen sollte, jedoch steht diese soweit raus, dass man keinesfalls RAM-Module benutzen sollte, die einen Kühlkörper haben, diese passen dann nicht mehr wirklich rein!
Negativ : Aussparung für die Lüftermontage . Bei dem Gehäuse gibt es eine Aussparung hinten, wenn man die Backplate für nen CPU-Lüfter austauschen will. Bei meinem mATX-Board passte diese absolut gar nicht! Man musste das Mainboard losschrauben um dann die Backplate einzufügen, nur mit Mini-ITX ist diese wohl komplett zugänglich.
Fazit : Im großen und Ganzen würde Ich das Gehäuse nicht empfehlen, obwohl es einen günstigen Preis hat , hatte Ich schon bessere Gehäuse in der Preiskategorie , mit den verbiegten Platten hatte ich vielleicht auch einfach nur Pech und habe ein Montagsmodell erwischt.
Die Materialstärke hat sich gegenüber zu meinem alten Aerocool Aero 800 halbiert, aber genauso auch der Preis.
Einziges kleines Manko ist, dass der Platz an der Rückseite für überschüssige Kabel knapp bemessen ist. 1-2 Zentimeter mehr wären noch Schmackhaft gewesen ^^
PS. Ich will mein altes blaue Aerocool Gehäuse zurück, aber das gibt es nicht mehr in der Farbe zu kaufen :,( *schnief*
Leider eine völlige Fehlkonstruktion.
Verbaute Frontlüfter können durch vorgebaute Glasplatte rechts keine Luft ziehen. Desweiteren ist die eigene Höhe der Lüfter so groß das ein ansaugen quasi nicht möglich ist.
Alle Lüfter können zwar über eingebaute Steuerung ihre Farbe wechseln, jedoch nicht in Geschwindigkeit geregelt werden. Demnach sind sie auch relativ laut.
Ein Einkürzen der Glasscheibe ist leider nicht möglich, da es sich hierbei um Sicherheistglas handelt und dies beim Versuch und tausende Stücke zerspringen würde.
Einen Staubfilter in der Front wäre bei diesem Preis auch ganz wünschenswert gewesen.
Alles in allem ein Gehäuse das leider für meinen Geschmack zu teuer ist. Da gibt es bessere zum gleichen Tarif. Schade
Da ich bei der großen Auswahl an Gehäusen etwas überfordert war, habe ich mich für dieses entschieden. Warum, war mit das billigste und es war klein. Ich bin jedoch so zufrieden, dass ich es heute noch nutze. Einziger Kritikpunkt ist der viel zu laute Frontlüfter, den ich sofort abgeklemmt und später gegen einen anderen ersetzt habe. Einen Ryzen 5 2700 mit einer RTX 2060 konnte ich ohne Probleme in dem kleinen Gehäuse betreiben. Wer kein kleines Gehäuse benötigt, sollte auch keins nutzen, da der Luftstrom nur begrenzt optimiert werden kann (Anzahl und Größe der möglichen Lüfter), wer jedoch eines benötigt, der kann hier beherzt zugreifen.
Das Blech ist natürlich nicht dick, aber die Verarbeitung stimmt soweit.
An der Front bietet es USB 3.0/2.0 und Audio.
Der verbaute Lüfter ist nur u er molex anzuschließen, aber habe ich direkt ersetzt.
Insgesamt hat es drei Plätze für Festplatten, dabei ist eine allerdings hinter dem Mainboard verschraubt, was beim ersetzen etwas blöd ist. Der Platz ist zwar nicht das Problem, aber die Befestigung.
Auch wenn ich das Case als Warehousedeal geschossen habe, so muss ich zumindest das fehlende Kabel vom powef/Resetschalter bemängeln. Das war nicht etwa abgerissen, das war erst gar nicht verlötet. Zum Glück hatte ich noch ein entsprechendes hier rumliegen. Auch Schrauben fehlten.
An sich tolles Case, klein, günstig aber trotzdem noch stylisch.
Well made and feels premium love the way the psu sits up top behind out of sight but if like me have a RGB psu you can turn it so light shows up inside the case as well , my only complaint is if using a AIO water cooler ie Corsair icue H100i XT pro it has at each end a solid block of metal and it just ever so slightly at the psu end over hangs onto the psu fan not a major problem but is rather tight other Aio may not do this but yer food for thought you can always mount Aio cooler at the bottom or the back exhaust or even the front so many options available I just choosed to have it at the top mainly to hide any cables as that's another slight con with the grill type top were psu sits you may see cables if not , cable management isn't bad and didnt have any cable length issues being such a tall tower and psu mounted at the top they reached the bottom fine as the motherboard is very low down I used the
game max full Modular RGB psu obviously some psu may have shorter cables so again something to think about
Over all with the mother board so low and a lot more room inside my temps have reduced significantly and with the 3 big 140mm front fans that's helped a lot also for the price I would like to have seen a dust filter at the front as from just looking from inside I could not see anything I may be wrong without pulling of the front panel that I haven't done yet there might be something but from just quick look I don't think there is , definitely one of the best cases for cooling and customisation available at a good price had 2 wait 4 days for delivery but was worth the wait , even with its few slight flaws it's workable


