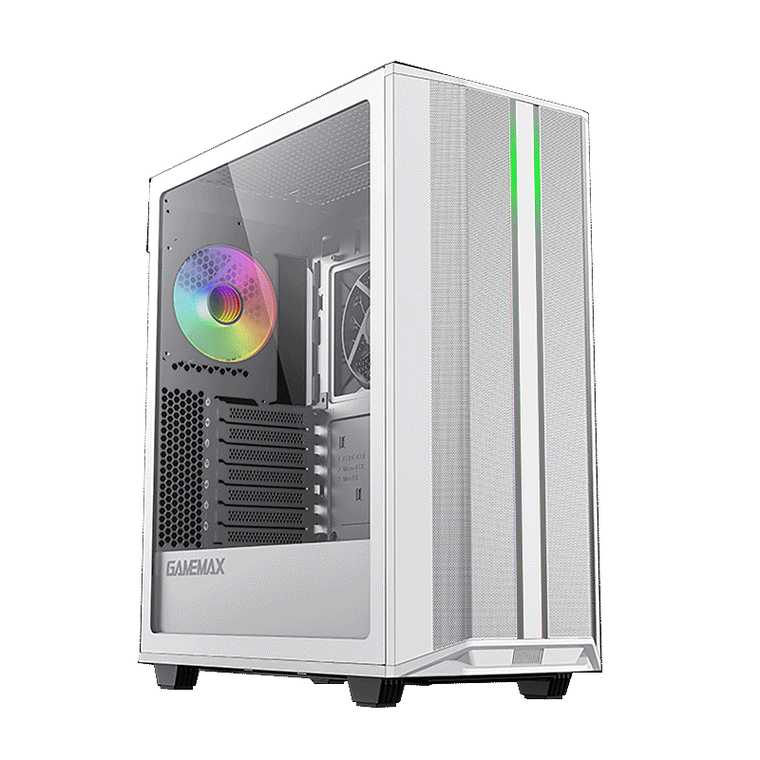
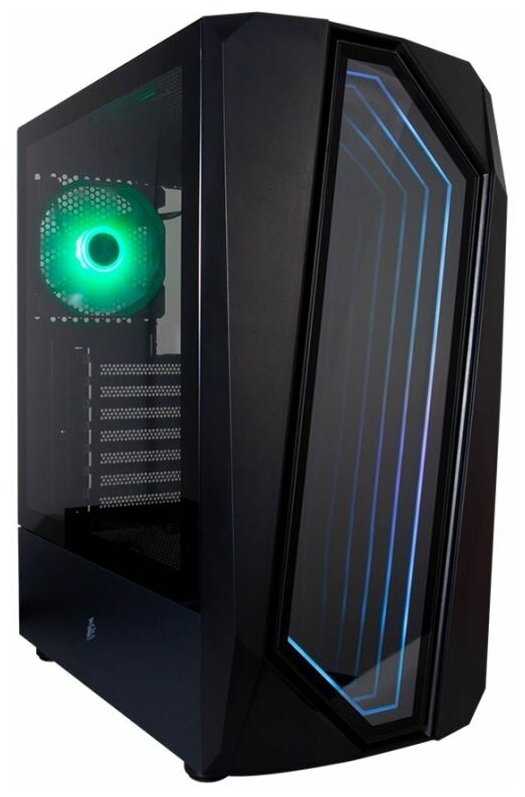
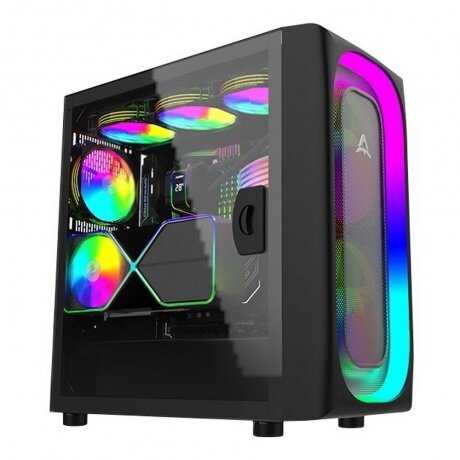
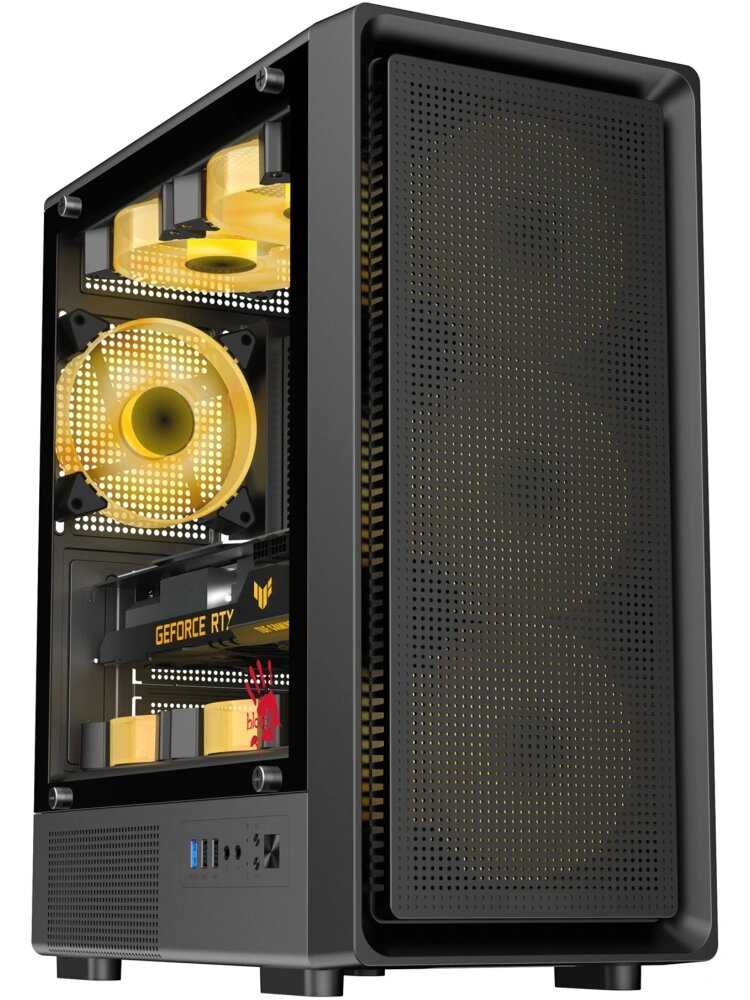
Отзывы о Компьютерный корпус AeroCool Aero One Frost
2364 отзывов пользователей о AeroCool Aero One Frost
Пользовались
AeroCool Aero One Frost?
Поделитесь своим опытом и помогите другим сделать правильный выбор

Скромный эксперт
27.09.2020
Оценка пользователя
Ужасно
Скромный эксперт
27.09.2020
Оценка пользователя
Великолепно
Скромный эксперт
27.09.2020
Оценка пользователя
Ужасно
Let me list the issues:
- No RGB Hub or Fan Hub, you have to connect each individual fan to a header on your motherboard( if it has that many )
- To install an SSD, the only mounting place possible blocks one of the 2 available cabling cutouts for power cables etc..
- To install a HDD you have to completely disassemble the bottom portion of the case
- To remove the bottom front fan, you have to completely remove the HDD cage and remove the power supply so you can very tightly use a screw driver to un-screw the fan screws..
Скромный эксперт
27.09.2020
Оценка пользователя
Великолепно
Let me list the issues:
- No RGB Hub or Fan Hub, you have to connect each individual fan to a header on your motherboard( if it has that many )
- To install an SSD, the only mounting place possible blocks one of the 2 available cabling cutouts for power cables etc..
- To install a HDD you have to completely disassemble the bottom portion of the case
- To remove the bottom front fan, you have to completely remove the HDD cage and remove the power supply so you can very tightly use a screw driver to un-screw the fan screws..
Скромный эксперт
27.09.2020
Оценка пользователя
Хорошо
Let me list the issues:
- No RGB Hub or Fan Hub, you have to connect each individual fan to a header on your motherboard( if it has that many )
- To install an SSD, the only mounting place possible blocks one of the 2 available cabling cutouts for power cables etc..
- To install a HDD you have to completely disassemble the bottom portion of the case
- To remove the bottom front fan, you have to completely remove the HDD cage and remove the power supply so you can very tightly use a screw driver to un-screw the fan screws..
Скромный эксперт
27.09.2020
Оценка пользователя
Ужасно
Let me list the issues:
- No RGB Hub or Fan Hub, you have to connect each individual fan to a header on your motherboard( if it has that many )
- To install an SSD, the only mounting place possible blocks one of the 2 available cabling cutouts for power cables etc..
- To install a HDD you have to completely disassemble the bottom portion of the case
- To remove the bottom front fan, you have to completely remove the HDD cage and remove the power supply so you can very tightly use a screw driver to un-screw the fan screws..
Скромный эксперт
27.09.2020
Оценка пользователя
Великолепно
Let me list the issues:
- No RGB Hub or Fan Hub, you have to connect each individual fan to a header on your motherboard( if it has that many )
- To install an SSD, the only mounting place possible blocks one of the 2 available cabling cutouts for power cables etc..
- To install a HDD you have to completely disassemble the bottom portion of the case
- To remove the bottom front fan, you have to completely remove the HDD cage and remove the power supply so you can very tightly use a screw driver to un-screw the fan screws..
Скромный эксперт
27.09.2020
Оценка пользователя
Ужасно
Let me list the issues:
- No RGB Hub or Fan Hub, you have to connect each individual fan to a header on your motherboard( if it has that many )
- To install an SSD, the only mounting place possible blocks one of the 2 available cabling cutouts for power cables etc..
- To install a HDD you have to completely disassemble the bottom portion of the case
- To remove the bottom front fan, you have to completely remove the HDD cage and remove the power supply so you can very tightly use a screw driver to un-screw the fan screws..
Скромный эксперт
27.09.2020
Оценка пользователя
Плохо
Let me list the issues:
- No RGB Hub or Fan Hub, you have to connect each individual fan to a header on your motherboard( if it has that many )
- To install an SSD, the only mounting place possible blocks one of the 2 available cabling cutouts for power cables etc..
- To install a HDD you have to completely disassemble the bottom portion of the case
- To remove the bottom front fan, you have to completely remove the HDD cage and remove the power supply so you can very tightly use a screw driver to un-screw the fan screws..
Скромный эксперт
27.09.2020
Оценка пользователя
Великолепно
Let me list the issues:
- No RGB Hub or Fan Hub, you have to connect each individual fan to a header on your motherboard( if it has that many )
- To install an SSD, the only mounting place possible blocks one of the 2 available cabling cutouts for power cables etc..
- To install a HDD you have to completely disassemble the bottom portion of the case
- To remove the bottom front fan, you have to completely remove the HDD cage and remove the power supply so you can very tightly use a screw driver to un-screw the fan screws..
Скромный эксперт
27.09.2020
Оценка пользователя
Хорошо
Let me list the issues:
- No RGB Hub or Fan Hub, you have to connect each individual fan to a header on your motherboard( if it has that many )
- To install an SSD, the only mounting place possible blocks one of the 2 available cabling cutouts for power cables etc..
- To install a HDD you have to completely disassemble the bottom portion of the case
- To remove the bottom front fan, you have to completely remove the HDD cage and remove the power supply so you can very tightly use a screw driver to un-screw the fan screws..
Скромный эксперт
27.09.2020
Оценка пользователя
Плохо
Let me list the issues:
- No RGB Hub or Fan Hub, you have to connect each individual fan to a header on your motherboard( if it has that many )
- To install an SSD, the only mounting place possible blocks one of the 2 available cabling cutouts for power cables etc..
- To install a HDD you have to completely disassemble the bottom portion of the case
- To remove the bottom front fan, you have to completely remove the HDD cage and remove the power supply so you can very tightly use a screw driver to un-screw the fan screws..
Скромный эксперт
27.09.2020
Оценка пользователя
Хорошо
Let me list the issues:
- No RGB Hub or Fan Hub, you have to connect each individual fan to a header on your motherboard( if it has that many )
- To install an SSD, the only mounting place possible blocks one of the 2 available cabling cutouts for power cables etc..
- To install a HDD you have to completely disassemble the bottom portion of the case
- To remove the bottom front fan, you have to completely remove the HDD cage and remove the power supply so you can very tightly use a screw driver to un-screw the fan screws..
Скромный эксперт
27.09.2020
Оценка пользователя
Великолепно
Let me list the issues:
- No RGB Hub or Fan Hub, you have to connect each individual fan to a header on your motherboard( if it has that many )
- To install an SSD, the only mounting place possible blocks one of the 2 available cabling cutouts for power cables etc..
- To install a HDD you have to completely disassemble the bottom portion of the case
- To remove the bottom front fan, you have to completely remove the HDD cage and remove the power supply so you can very tightly use a screw driver to un-screw the fan screws..
Скромный эксперт
27.09.2020
Оценка пользователя
Ужасно
Let me list the issues:
- No RGB Hub or Fan Hub, you have to connect each individual fan to a header on your motherboard( if it has that many )
- To install an SSD, the only mounting place possible blocks one of the 2 available cabling cutouts for power cables etc..
- To install a HDD you have to completely disassemble the bottom portion of the case
- To remove the bottom front fan, you have to completely remove the HDD cage and remove the power supply so you can very tightly use a screw driver to un-screw the fan screws..
Скромный эксперт
27.09.2020
Оценка пользователя
Великолепно
Let me list the issues:
- No RGB Hub or Fan Hub, you have to connect each individual fan to a header on your motherboard( if it has that many )
- To install an SSD, the only mounting place possible blocks one of the 2 available cabling cutouts for power cables etc..
- To install a HDD you have to completely disassemble the bottom portion of the case
- To remove the bottom front fan, you have to completely remove the HDD cage and remove the power supply so you can very tightly use a screw driver to un-screw the fan screws..
Скромный эксперт
14.10.2020
Оценка пользователя
Ужасно
2. Cheap Material... Easily Dented..(For Picture on Arrival)
3. Light Weight.. Not Durable
4. Super Tight for DVD Drivers (Front Panel cables are very Congested).
5. On Delivery PC case Package and Side Covers are damaged and dented)
6. Waste of Money and Time(Ordered on 26-09-2020)
I don't want to waste my time and money in Returning and reordering another item from the Same Supplier.
Worst Experience in Amazon ( First Time )
Скромный эксперт
14.10.2020
Оценка пользователя
Ужасно
Скромный эксперт
27.09.2020
Оценка пользователя
Великолепно
Mainboardgrößen: Ich habe ein Asrock B450 Pro4 (ATX-Format) und es hat ausreichend Platz. Auch mein altes noch größeres Mainboard (Asus Sabertooth 990FX R2.0) hat noch Platz darin. Damit ist es für ALLE Mainboardgrößen bis 30.5 x 24.4 cm geeignet.
Grafikkartengrößen: Ich habe eine Geforce GTX 980 mit 29,9 x 11,4 cm ohne Probleme unter bekommen. Etwa 4 Finger sind noch Platz zum vorderen Gehäuserand.
Festplatten: Es können unten im Schacht zwei 3,5" Festplatten mittels Schulsystem untergebracht werden. Kleinere 2,5" Festplatten (SSD) können an der Rückseite montiert werden.
Kabelmanagement: Es gibt genügend Öffnungen um die meisten Kabel gut hinter das Mainboard zu verstecken. Leider sind die Öffnung ohne Gummiteile und darum optisch nicht so schön.
Seitenfenster: Hier gefallen mir zwei Dinge besonders gut. Erstens ist das Glas abgedunkelt, was für Beleuchtungseffekte besonders schön ist. Ideal für low-budget-PCs, die nicht so hochwertige Komponenten haben, da man diese nur schlecht sieht. Zweitens handelt es sich um eine ganze Plexiglas-Scheibe, ohne Rand. Das ist bei einigen anderen Modellen auch heute noch nicht der Fall! Vom Optischen her erkenne ich zwischen dem Plexiglas und einer echten Glasscheibe keinen Unterschied.
Positiv:
- schlichtes, aber schönes Design
- LED-Streifen kann in mehrere Farben und Laufmuster per Tastendruck gewechselt werden
- abgedunkeltes, randloses Seitenfenster
- genügend Platz für Gamer-PC
- abnehmbare magnetische Staubfiltermatte
- geringe Außenmaße
- Standfüße mit Gummimatte
- Metallschacht unten für Netzteil und Festplatten
- Anschlussmöglichkeiten oben (1x USB 3.0, 2 x USB 2.0, Speicherkartenlesegerät)
Negativ:
- kleine Verarbeitungsfehler (LED-Streifen unsauber verarbeitet)
- hinteren Abdeckungen müssen herausgebrochen werden (für Grafikkarte usw.)
- teilweise große Öffnungen für Kabelmanagement
- Rückseite nur wenig Platz für Kabel (Seitenteil ist schwer zu schließen)
- nur ein Lüfter auf der Rückseite verbaut (vorne können noch zwei eingebaut werden)
Fazit:
Kurz bevor ich mir den Aerocool Rift kaufte, habe ich den Sharkoon TG5 RGB bestellt. Dieser kostet rund das Doppelte, sieht optisch schlechter aus und ist von der Verarbeitung ein Witz!
Ich kann das Aerocook Rift für alle die ein wenig LED-Feeling haben wollen, aber nicht mehr als 40 Euro ausgeben möchten, nur empfehlen!
Скромный эксперт
27.09.2020
Оценка пользователя
Ужасно
CPU: i5-8400
GPU: KFA2 GTX 1060 6GB
Motherboard: Tampa2
RAM: Micron 8GB
^falls relevant.
Скромный эксперт
27.09.2020
Оценка пользователя
Хорошо
Mein Hauptkritikpunkt: Im Werkszustand habe ich meine GeForce GTX 1050 Ti nicht einbauen können. Das lag daran, dass ein Steg über den Einbauschächten des Gehäuses im Weg war. Wahlweise blieb ich mit der Blende an diesem Steg hängen oder saß mit der Blende auf dem Mainboard auf, wenn ich die Karte darunter durchfädeln wollte. Letzten Endes habe ich das Problem gelöst, indem ich den Steg mittels Werkzeug aufgebogen habe.
Insgesamt ist das Gehäuse aber trotzdem empfehlenswert. Es schaut gut aus und ist bis auf das kleine, erwähnte Problem sehr durchdacht. Die LED-Beleuchtung ist eine nette Spielerei, die ich persönlich aber nicht brauche.
Скромный эксперт
27.09.2020
Оценка пользователя
Великолепно
Für Kabelmanagement ist genügend Platz, sollte man es mit der Menge der Kabel nicht übertreiben.
Lautstärkedämmend ist das Gehäuse für den Preis natürlich nicht. Die HDD hat in der HDD-Halterung die beiden rechten Steckplätze der RAM überdeckt (AB350M Pro4 Motherboard).
Ein gutes Budget-Gehäuse.
Скромный эксперт
27.09.2020
Оценка пользователя
Ужасно
Positiv : Das Kabel Management ist ganz in Ordnung, ich hatte kein Problem für dieses Build meine Kabel schön zu verstauen, da hatte ich schon andere Gehäuse in dieser Preiskategorie wo dieses 0 vorhanden war.
Positiv : Das Design ist ganz schön gewählt, es sieht schlicht aus, hat vorne eine kleine Glasscheibe mit einem verbauten Lüfter.
Neutral : Die Wärme im Gehäuse ist nicht sonderlich gut, aber auch nicht ganz schlecht, ich würde aufjedenfall keine größere Grafikkarte verbauen. Die Grafikkarte hat nicht sehr viel Luft zum Atmen , sodass ich in Games trotz neuer Wärmeleitpaste bei 85 Grad liege. Die Temperatur des CPU's ist ganz in Ordnung und man hat die Möglichkeit noch einen kleinen Lüfter hinten zu verbauen.
Negativ : Das Blech dieses Gehäuses ist leider nicht sehr stabil, das Gehäuse kam schon leicht gebogen bei mir an (siehe Fotos). Es ist zwar nicht sehr viel, trotzdem ziemlich ärgerlich für einen neuen Artikel. Die PCIe Slots ist auch nur ein dünnes Blech was man rausbrechen muss, jedoch waren die leider auch schon bei der Ankunft etwas verbogen was Optisch natürlich nicht so gut ist.
Negativ : Position für die HDD , diese liegt genau auf der Höhe der RAM-Slots, was eigentlich kein Problem darstellen sollte, jedoch steht diese soweit raus, dass man keinesfalls RAM-Module benutzen sollte, die einen Kühlkörper haben, diese passen dann nicht mehr wirklich rein!
Negativ : Aussparung für die Lüftermontage . Bei dem Gehäuse gibt es eine Aussparung hinten, wenn man die Backplate für nen CPU-Lüfter austauschen will. Bei meinem mATX-Board passte diese absolut gar nicht! Man musste das Mainboard losschrauben um dann die Backplate einzufügen, nur mit Mini-ITX ist diese wohl komplett zugänglich.
Fazit : Im großen und Ganzen würde Ich das Gehäuse nicht empfehlen, obwohl es einen günstigen Preis hat , hatte Ich schon bessere Gehäuse in der Preiskategorie , mit den verbiegten Platten hatte ich vielleicht auch einfach nur Pech und habe ein Montagsmodell erwischt.
Скромный эксперт
27.09.2020
Оценка пользователя
Великолепно
Die Materialstärke hat sich gegenüber zu meinem alten Aerocool Aero 800 halbiert, aber genauso auch der Preis.
Einziges kleines Manko ist, dass der Platz an der Rückseite für überschüssige Kabel knapp bemessen ist. 1-2 Zentimeter mehr wären noch Schmackhaft gewesen ^^
PS. Ich will mein altes blaue Aerocool Gehäuse zurück, aber das gibt es nicht mehr in der Farbe zu kaufen :,( *schnief*
Скромный эксперт
27.09.2020
Оценка пользователя
Плохо
Leider eine völlige Fehlkonstruktion.
Verbaute Frontlüfter können durch vorgebaute Glasplatte rechts keine Luft ziehen. Desweiteren ist die eigene Höhe der Lüfter so groß das ein ansaugen quasi nicht möglich ist.
Alle Lüfter können zwar über eingebaute Steuerung ihre Farbe wechseln, jedoch nicht in Geschwindigkeit geregelt werden. Demnach sind sie auch relativ laut.
Ein Einkürzen der Glasscheibe ist leider nicht möglich, da es sich hierbei um Sicherheistglas handelt und dies beim Versuch und tausende Stücke zerspringen würde.
Einen Staubfilter in der Front wäre bei diesem Preis auch ganz wünschenswert gewesen.
Alles in allem ein Gehäuse das leider für meinen Geschmack zu teuer ist. Da gibt es bessere zum gleichen Tarif. Schade
Скромный эксперт
27.09.2020
Оценка пользователя
Великолепно
Скромный эксперт
27.09.2020
Оценка пользователя
Хорошо
Da ich bei der großen Auswahl an Gehäusen etwas überfordert war, habe ich mich für dieses entschieden. Warum, war mit das billigste und es war klein. Ich bin jedoch so zufrieden, dass ich es heute noch nutze. Einziger Kritikpunkt ist der viel zu laute Frontlüfter, den ich sofort abgeklemmt und später gegen einen anderen ersetzt habe. Einen Ryzen 5 2700 mit einer RTX 2060 konnte ich ohne Probleme in dem kleinen Gehäuse betreiben. Wer kein kleines Gehäuse benötigt, sollte auch keins nutzen, da der Luftstrom nur begrenzt optimiert werden kann (Anzahl und Größe der möglichen Lüfter), wer jedoch eines benötigt, der kann hier beherzt zugreifen.
Скромный эксперт
27.09.2020
Оценка пользователя
Плохо
Das Blech ist natürlich nicht dick, aber die Verarbeitung stimmt soweit.
An der Front bietet es USB 3.0/2.0 und Audio.
Der verbaute Lüfter ist nur u er molex anzuschließen, aber habe ich direkt ersetzt.
Insgesamt hat es drei Plätze für Festplatten, dabei ist eine allerdings hinter dem Mainboard verschraubt, was beim ersetzen etwas blöd ist. Der Platz ist zwar nicht das Problem, aber die Befestigung.
Auch wenn ich das Case als Warehousedeal geschossen habe, so muss ich zumindest das fehlende Kabel vom powef/Resetschalter bemängeln. Das war nicht etwa abgerissen, das war erst gar nicht verlötet. Zum Glück hatte ich noch ein entsprechendes hier rumliegen. Auch Schrauben fehlten.
An sich tolles Case, klein, günstig aber trotzdem noch stylisch.
Скромный эксперт
14.10.2020
Оценка пользователя
Великолепно
Well made and feels premium love the way the psu sits up top behind out of sight but if like me have a RGB psu you can turn it so light shows up inside the case as well , my only complaint is if using a AIO water cooler ie Corsair icue H100i XT pro it has at each end a solid block of metal and it just ever so slightly at the psu end over hangs onto the psu fan not a major problem but is rather tight other Aio may not do this but yer food for thought you can always mount Aio cooler at the bottom or the back exhaust or even the front so many options available I just choosed to have it at the top mainly to hide any cables as that's another slight con with the grill type top were psu sits you may see cables if not , cable management isn't bad and didnt have any cable length issues being such a tall tower and psu mounted at the top they reached the bottom fine as the motherboard is very low down I used the
game max full Modular RGB psu obviously some psu may have shorter cables so again something to think about
Over all with the mother board so low and a lot more room inside my temps have reduced significantly and with the 3 big 140mm front fans that's helped a lot also for the price I would like to have seen a dust filter at the front as from just looking from inside I could not see anything I may be wrong without pulling of the front panel that I haven't done yet there might be something but from just quick look I don't think there is , definitely one of the best cases for cooling and customisation available at a good price had 2 wait 4 days for delivery but was worth the wait , even with its few slight flaws it's workable
Скромный эксперт
14.10.2020
Оценка пользователя
Великолепно
I purchased additional fans off eBay and it really makes a difference both visually and for cooling. Very easy to assemble and the additional fans plug into the existing fan microcontroller so only one cable then connects back to the Chassis header on the motherboard - not several. The layout and internal of the case is superb providing maximum air flow and it can also accommodate a massive cooler heatsink. RGB fans works great with an Asus X570 TUF motherboard with Aura sync. The case also comes with a remote control to independently control the RGB fans (change colour, fan speeds etc). The dark tempered glass adds a beautiful finish to the case and its crystal clear. This case is excellent value for money considering its features compared to far more expensive cases available. I did contact technical support via their website to query some connections of the case fan wires and fair play they responded very quickly and resolved my queries so thats excellent to see with a company. Overall 5 stars!! Don't waste your money on more expensive cases. Aerocool produces have created an amazing case. Check out their website and you see they do lots of others styles and looks.
Скромный эксперт
14.10.2020
Оценка пользователя
Великолепно
Скромный эксперт
14.10.2020
Оценка пользователя
Великолепно
Скромный эксперт
14.10.2020
Оценка пользователя
Великолепно
Скромный эксперт
14.10.2020
Оценка пользователя
Великолепно
Скромный эксперт
14.10.2020
Оценка пользователя
Великолепно
Скромный эксперт
14.10.2020
Оценка пользователя
Великолепно
Скромный эксперт
14.10.2020
Оценка пользователя
Великолепно
Скромный эксперт
14.10.2020
Оценка пользователя
Хорошо
Cuando están los componentes instalados, da sensación de "buena torre", de producto de calidad y majestuoso,por sus dimensiones...
Metal de calidad y bien acabado, el cristal templado es muuuy bueno,y además, ahumado,lo que le da un toque mas "premium" si cabe...tiene espacio"justo" por detrás para esconder los cables,y un controlador de 10 puertos para controlar ventiladores(ojo, de 6 PIN,propietarios..han de ser de Aerocool,están pensados para el modelo EDGE,y puedes controlar la iluminación RGB y también la velocidad de los ventiladores desde el mando a distancia que trae, sí,esto último es verdaderamente genial,ya que si están sonando algo fuerte, con pulsar un botón se ponen al mínimo de revoluciones...bravo por Aerocool con respecto a este detalle...el cableado es de buena calidad y los terminales están muy bien soldados,por lo que no se van a soltar ni a dejar de funcionar fácilmente.La botonera frontal es de aluminio y cuando pulsas los botones se ve que son de buena calidad, no hay holguras, así que hasta aquí un diez por los materiales y el ensamblado,añaden en el frontal ,además,dos pequeños led de color rojo y azul para el funcionamento del disco duro,cosa que me gusta en una torre.
En cuanto a las dimensiones, son de GRAN TORRE, 51cms de alto x 25 de ancho x 48 de profundo,así que aquí no habrá problemas para instalar cualquier tipo de componente o refrigeración líquida...hasta aquí, es lo bueno ,pasamos a lo que me he encontrado que me ha gustado menos....
Empecemos por la ausencia de varias cosas que las veo indispensables en una torre de altas prestaciones, como se supone que es este producto:
* No trae soporte de apoyo para tarjetas gráficas, cosa que no entiendo,ya que se le puede poner una gráfica máximo de 38cms, así que has de comprar algún soporte aparte para que la gráfica con el tiempo no se estropee.
*No trae gomas troqueladas pasamuros, son agujeros abiertos, por lo que deja ver la mayoría de cableado que pasa através de ellos,y esto me parece que desluce bastante el setup que estés montando.
*Tiene poco espacio para montar discos duros, cualquier torre que cuesta la mitad,tiene al menos dos opciones más que esta,porque esta torre te permite instalar 2 discos duros SSD y 2 Discos duros de 3/5,y....se acabó,además, he de comentar algo relacionado con los HDDs mecánicos....Trae como he dicho, 2 pletinas con una lengüeta inferior y un tornillo superior que son los que sujetan el disco duro al chasis, pero,ojo...no se si me tocó la defectuosa o es que está así de mal diseñado, lo cierto es que al conectar el molex y el conector Sata al disco, estos "TAPAN" LITERALMENTE EL TORNILLO QUE HAS DE APRETAR PARA QUE SEAN FIJADOS AL CHASIS, sí se les puede dar la vuelta,y poner el disco duro boca abajo, pero el espacio que queda entre el disco duro y el borde de la caja es mínimo y,a veces insuficiente,según los cables que por ahí estén pasando...esto lo veo NEFASTO y pensado sin detenimiento.
* Algo muy muy gracioso,y que me dio gran cantidad de dolores de cabeza....LA INFORMACION IMPRESA EN LA CAJA....quiero decir:
-En la caja se pueden leer muchas características de la torre,compatible RGB, amplitud de posibilidades para refrigeración líquida y por aire,etc...en esto último es donde quiero hacer hincapié....La caja permite en el espacio frontal (entre otras combinaciones) 2 Ventiladores de 200 mm máximo, eso es lo que pone,se puede comprobar, y sí se les pueden instalar, lo que no dicen es que para poder instalarlos, los ventiladores han de ser inferiores a 2.8 cms DE GROSOR,,que es el espacio que queda libre en el marco frontal de cristal templado,y, si alguien sabe de la existencia de alguno,que sean RGB, que me lo diga, porque los que busqué eran todos mínimo 3.2 cms, por lo que me quedé con dos ventiladores comprados,que, seguramente voy a devolver,porque no los quiero "pa na"...No, señores de Aerocool,no se pueden instalar en el frontal de este modelo ventilación de 200 mm, NO SE PUEDE,máximo 140 mm es lo que admite, así que,por favor, corrijan esa errata de la impresión de la caja de la TOR PRO,para que futuros consumidores no se encuentren con este problema.
*El espacio que han dejado para la fuente de alimentación es muy justo, cuidado si tienes una fuente de alimentación grandota, porque la bandeja lateral no podría cerrar...mide bien tu fuente de alimentación antes de comprar esta torre.
*Por último, en mi caso ,instalé la refrigeración líquida en el lateral,así que el hueco feísimo que puede quedar en la parte superior en mi caso quedó tapado por el radiador y los ventiladores, de lo contrario, hubiera quedado un hueco de chapa perforada bastante feo y escueto...
RESUMEN.
Buena caja por materiales y dimensiones,pero le faltan muchos detalles que son imprescindibles para un setup gaming...la recomendaría?, obviamente, NO.
Скромный эксперт
14.10.2020
Оценка пользователя
Великолепно
Das Gehäuse ist meiner Meinung nach tip top! Die Verarbeitungs des Gehäuses sowohl auch die Optik ist für diese Preisklasse sehr gut. Einbau der Hardware sowohl auch das Kabelmanagement verlief alles reibungslos. Die Lüfterlautstärke ist auch ok ich persönlich finde sie nicht zu laut allzu leise sind sie allerdings auch nicht was aber meiner Meinung nach nicht wirklich störend ist. Was vielen denke ich wichtig ist, ist die Kühlung dazu kann ich als "Zocker" nur sagen dass sie auf jeden Fall ausreichend ist, wo ich Anfangs skeptisch war da die drei vorderen Lüfter die Luft nur rechts an der Seite durch einen ca. 3cm breiten und 40cm langen Lufteinlass einziehen dies aber anscheinend voll ausreichend ist. Mein System: Intel i7 8700k (nicht übertaktet!) / EVGA GeForce GTX 1070Ti Super Clocked Black Edition / 16GB G.Skill RipJaws V DDR4-3200... Grafikkarte unter Last 47-52°, CPU unter Last 32-37° also für Luftkühlung vollkommen Ok!
Fazit.: Wer sowie ich nicht 200-300€ für ein Big Tower ausgeben will trotz allem aber ein gutes sucht sollte bei diesem Big Tower zuschlagen. ;) Habe es seit vier Tagen im Betrieb und hab bis jetzt keine negativen Mängel feststellen können.
Скромный эксперт
14.10.2020
Оценка пользователя
Великолепно
Скромный эксперт
14.10.2020
Оценка пользователя
Великолепно
Скромный эксперт
14.10.2020
Оценка пользователя
Великолепно
le boitier est parfait, câble management est simple avec beaucoup de place à l'arrière.
Les 4 ventilos sont branché sur un contrôleur interne ce qui permet d'avoir un seul et unique sys_fan utilisé sur la CM.
Parfait pour les amateurs de RGB.
Скромный эксперт
14.10.2020
Оценка пользователя
Хорошо
Похожие товары с лучшей оценкой


Wizemart © 2026.
Рекомендательная система по умному выбору товаров по отзывам и рейтингам
